
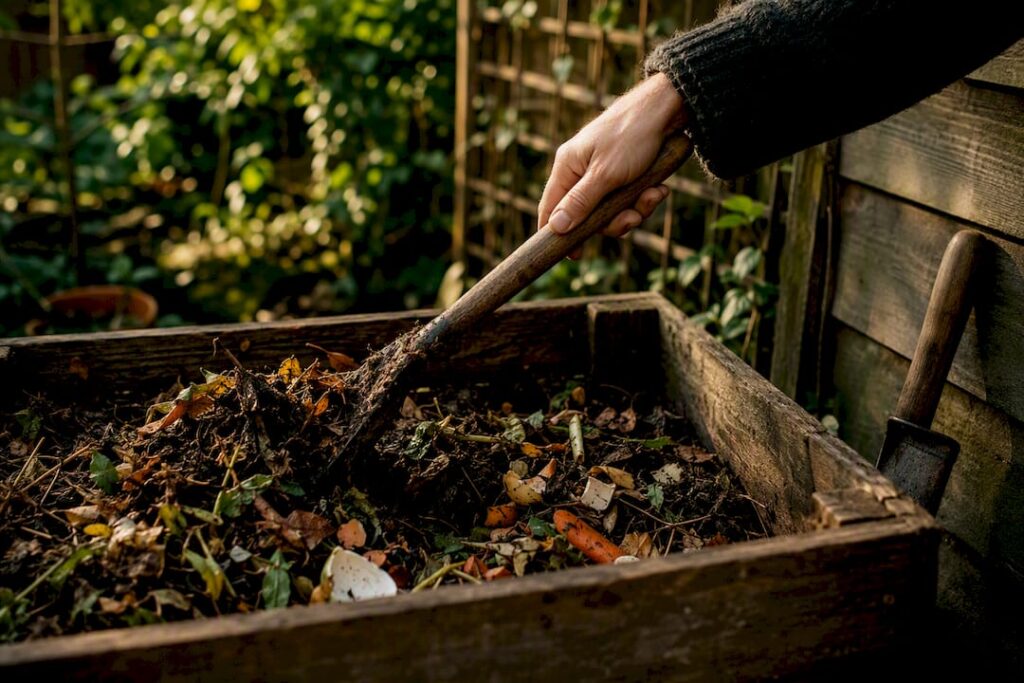
Most households can successfully compost at home, and the right method depends on your goals, not your yard size. Want compost fast and don’t mind babysitting a thermometer? Build a hot pile or grab a tumbler. Want something you can basically ignore? A cold pile or trench works fine. Living in an apartment with a balcony at best? Vermicompost is your answer.
What Is Composting at Home, and Why Does It Work?
Composting is controlled decomposition. You’re not doing the work yourself. Microbes, worms, and other soil creatures are doing the actual breakdown, and your job is just to give them what they need. That’s really the whole secret. As one extension resource puts it, composting simply speeds up a natural process that happens anyway in forests and fields, except you’re creating the ideal environment for it instead of leaving it to chance.
The organisms driving this show up in stages. Bacteria arrive first and start breaking down the easy stuff. Fungi and actinomycetes handle tougher material like woody stems. Worms, beetles, and other larger decomposers move in as things cool down and finish the job.
The payoff is bigger than a tidy backyard corner. Home composting delivers real benefits:
- Better soil structure that holds air and roots more easily
- Improved water retention, which means less watering during dry stretches
- Nutrient cycling that feeds plants without synthetic fertilizer
- Less landfill waste, since food scraps and yard trimmings stop taking up truck space and generating methane
- Lower fertilizer costs over time as your soil builds its own fertility
None of it happens without four basic ingredients: carbon, nitrogen, water, and oxygen. Microbes need all four in reasonable balance to stay active, and skipping one is usually why a pile stalls out or starts to smell.
Which Home Composting Method Fits Your Space?
There isn’t one correct way to compost. The EPA notes that successful home composters use everything from pallet bins to plastic tumblers, and the right choice comes down to how much waste you generate and how much effort you’re willing to put in.
Backyard pile or bin. This is the classic approach, and it splits into two speeds. A hot pile, built all at once and turned regularly, can finish in a few months. A cold pile, where you add material as it accumulates and rarely turn it, takes much longer but demands almost nothing from you.
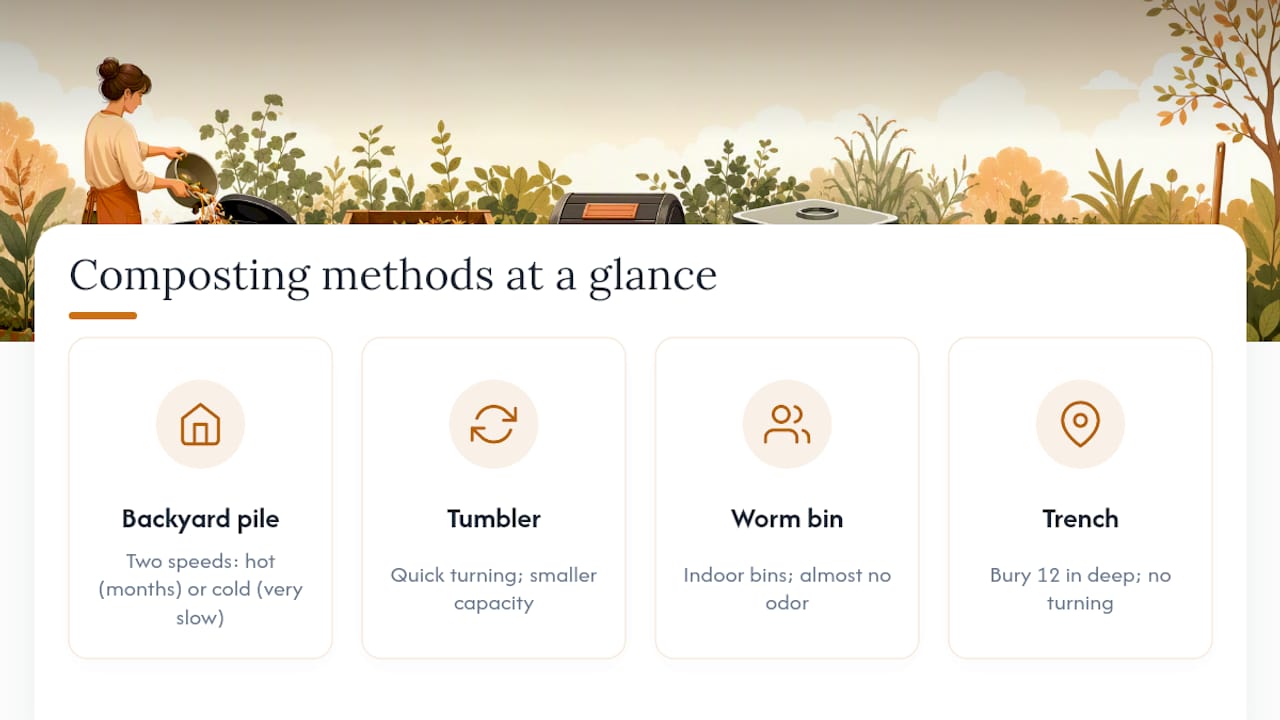
Tumbler. A sealed drum on a frame that you spin to mix contents. Turning takes seconds instead of the shovel work a ground pile requires, and the enclosed design keeps pests out. The tradeoff is capacity. Most tumblers hold less than an open bin, so they suit smaller households better than a family running through a lot of yard waste.
Vermicomposting. Worm bins work indoors, under a sink, in a garage, or on an apartment balcony, and they handle kitchen scraps with almost no odor when managed properly. Red wigglers are the standard choice for this, not earthworms from your yard, since they thrive in the confined, food-rich conditions of a bin.
Trench or burial composting. You dig a hole, bury scraps twelve inches deep, and cover them. No turning, no odor, no equipment. It’s slow, and you need enough yard space to rotate trench locations, but it’s about as low maintenance as composting gets.
Pro Tip: If you’re not sure which method fits, ask yourself one question: do you want finished compost fast, or do you just want your food scraps to disappear? That answer alone eliminates two of the four options.
What Can You Compost? Ingredients and the Working Recipe
Every pile needs “browns” (carbon) and “greens” (nitrogen), and getting that balance right is the difference between a pile that cooks and one that just sits there rotting.
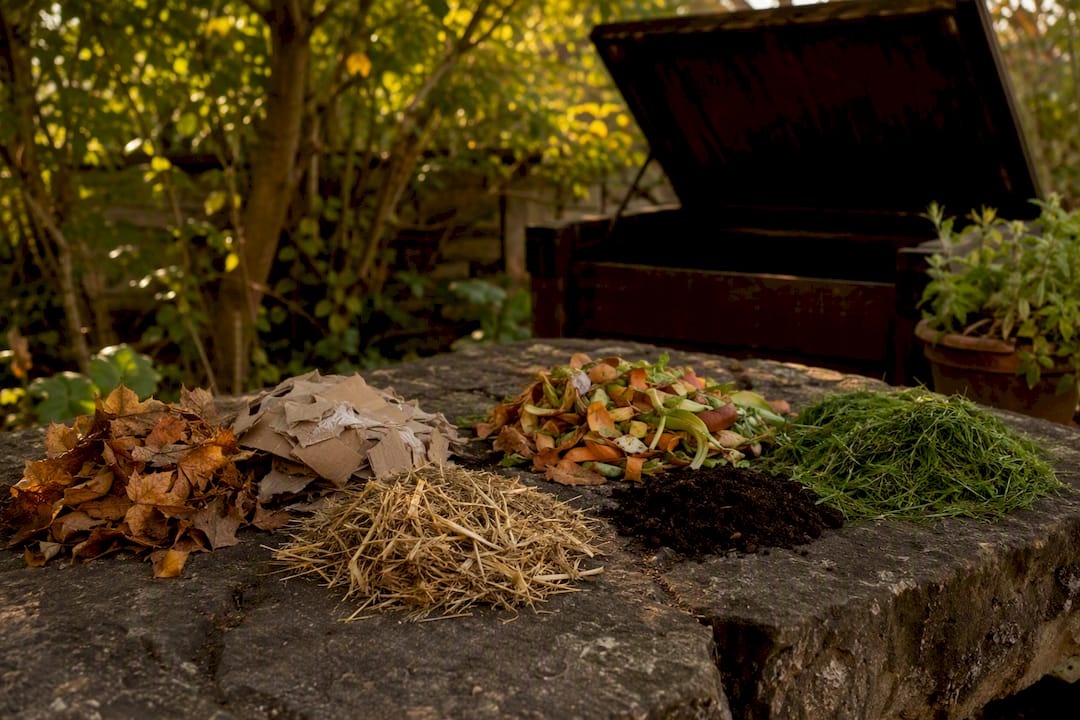
Browns include dried leaves, cardboard, straw, wood chips, and shredded paper. Greens include vegetable scraps, coffee grounds, grass clippings, and eggshells. Skip meat, dairy, and oily foods in a standard backyard setup, since they attract pests and slow things down in the wrong way.
The EPA’s practical guidance recommends roughly two parts browns to one part greens by volume. That ratio isn’t arbitrary. Too many greens and the pile turns slimy and starts to smell like ammonia. Too many browns and decomposition crawls to a stop because there isn’t enough nitrogen to fuel the microbes.
Moisture matters just as much. The pile should feel like a wrung-out sponge, damp but never dripping. Squeeze a handful; if water runs out, add browns. If it crumbles apart dry, add water or fresh greens.
Particle size also affects speed. Chopping vegetable scraps or shredding cardboard exposes more surface area to microbes, which speeds decomposition noticeably compared to tossing in whole items.
One number worth remembering: a pile needs to be roughly 3 feet by 3 feet by 3 feet to retain enough heat for active hot composting. Smaller piles lose heat too fast to reach thermophilic temperatures, and much larger ones become hard to turn and aerate evenly.
How Do You Set Up Your First Compost Pile?
Getting started takes less time than most people expect. Here’s the sequence that works:
- Pick your spot. Choose a level, well-drained location with partial shade, access to a hose, and enough distance from your house foundation or crawl space to avoid moisture problems. Convenience counts too. If it’s a hike to reach, you’ll stop maintaining it within a month.
- Choose your container. A simple wire cage or pallet bin costs almost nothing and works well for backyard piles. Tumblers run higher upfront but simplify turning. Worm bins come in stackable trays or single totes, sized for however much kitchen waste your household produces weekly.
- Lay a base layer. Start with coarse browns like twigs or straw at the bottom for airflow and drainage.
- Layer browns and greens. Alternate layers roughly following that 2:1 ratio, breaking up large chunks as you go.
- Water to sponge-moist. Dampen each layer as you build rather than soaking it all at the end.
- Insert a compost thermometer if you’re going the hot route. This step is optional for cold piles or trench composting.
- Schedule your first turn for one to two weeks out, giving the pile time to start heating.
Setup guidance from UConn Extension echoes this same layering approach, and it holds up whether you’re using a bin, a tumbler, or an open pile.
Pro Tip: Keep a small lidded bucket on your kitchen counter for scraps between trips outside. Line it with a paper bag or a few sheets of newspaper, and you’ll cut down on both fruit flies and the awkward smell of an open container.
How Do You Fix Common Composting Problems?
A well-run hot pile should reach 130 to 170°F at its core. That heat isn’t just a bonus. It’s what kills weed seeds and most pathogens, and it’s the clearest sign your pile is actively cooking. When temperatures drop, that’s your cue to turn the pile and reintroduce oxygen and moisture.
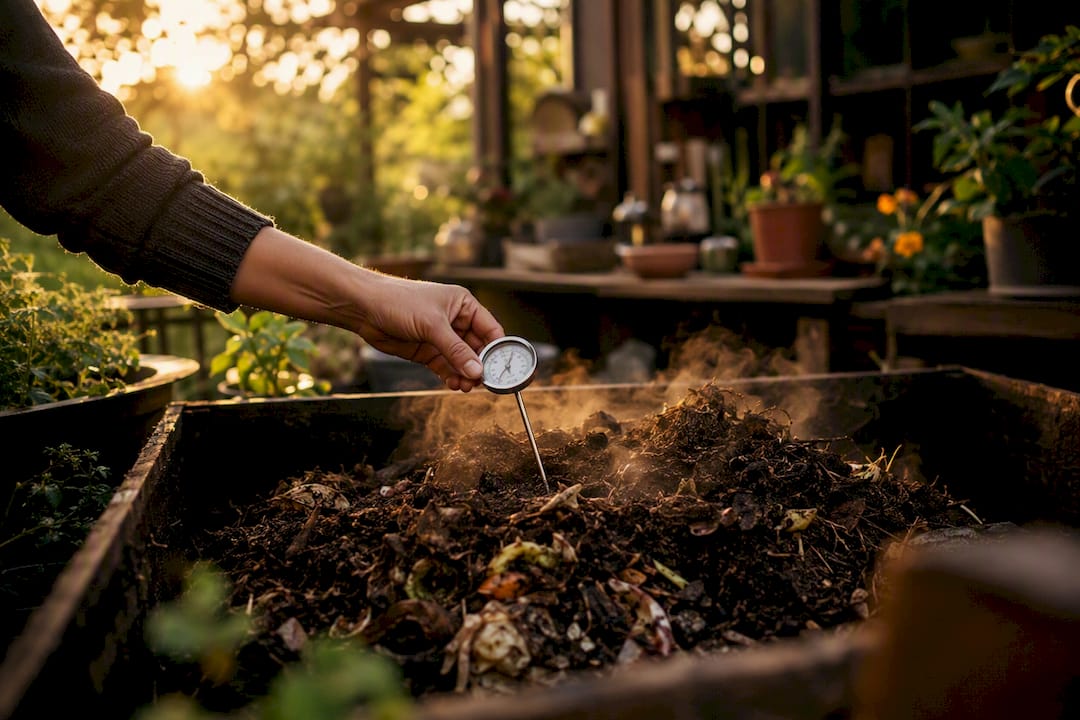
Winter changes the calculus. Turn less often once temperatures fall outside, since excess turning during cold months lets heat escape and can stall the whole process.
Odor problems almost always trace back to one of three causes: too much moisture, not enough air, or too many greens relative to browns. The fix is straightforward:
- Smells like ammonia? Add more browns.
- Smells sour or swampy? Turn the pile to add oxygen and mix in dry material.
- Attracting flies? Cover exposed food scraps with a layer of browns immediately after adding them.
Most beginner failures come down to exactly this: smelly piles from bad ratios or uncovered scraps, which a quick layer of leaves or shredded paper usually resolves within a day or two.
Pest prevention works best as a habit rather than a reaction. Bury fresh scraps under existing material, use a closed bin or tumbler if rodents are a known issue in your area, and secure lids tightly. If rodents do show up, stop adding food scraps temporarily and switch to browns only until activity dies down.
You don’t need a thermometer for every pile. Cold piles and trench composting can be managed entirely by feel and smell. West Virginia University Extension offers a helpful troubleshooting reference if your pile seems stuck despite good ratios and moisture, since slow decomposition sometimes just needs smaller particle sizes or a slightly warmer, more sheltered location.
How Long Does Compost Take, and How Do You Know It’s Ready?
Timelines vary a lot by method, and setting the right expectation up front saves a lot of frustration.
- Hot pile composting: roughly 3 to 6 months with regular turning and attention to ratios.
- Cold pile or trench composting: a year or longer, since there’s minimal management involved.
- Vermicomposting: typically 3 to 6 months for worms to process bin contents into usable castings.
Finished compost has a distinct look and smell. It’s dark brown, crumbly, and smells like fresh earth, not like anything you originally put in. If you can still identify eggshell fragments or banana peels, give it more time. Many gardeners let finished compost cure for a few extra weeks before use, which lets any remaining acidity mellow out.
Use it as mulch around trees and shrubs, mix it into garden beds as a soil amendment, or blend it into potting mixes at roughly 20 to 30 percent of total volume. One caution for edible gardens: if you’re incorporating any animal manures into your compost, make sure the pile reached hot composting temperatures and finished curing fully, since manure can carry pathogens that need sustained heat to break down.
How Do You Safely Compost Meat, Dairy, and Cooked Food Scraps?
Standard backyard bins and open piles aren’t built for meat, dairy, or oily cooked leftovers. These items decompose slowly at the moderate temperatures a typical home pile reaches, and in the meantime they attract rodents, raccoons, and flies faster than almost anything else you’d add. A reference guide from UF/IFAS Extension lists these among the items generally not recommended for home setups, right alongside things like pet waste and diseased plants.
That doesn’t mean these scraps are a lost cause. A hot pile that reliably holds temperatures in the upper range, closer to 170°F, can break down small amounts of cooked food more safely than a cold pile ever could, since sustained heat helps neutralize the bacteria that make raw meat and dairy risky. Even then, bury scraps deep in the center of the pile rather than near the surface, and only add small quantities at a time.
If you’re not confident your setup runs hot enough, or you’re using vermicomposting or a cold pile, skip meat and dairy entirely. Many municipal curbside or drop-off composting programs are specifically designed to handle these items at scale, using controlled facilities that reach and hold higher temperatures than a backyard system realistically can. Check with your local waste department to see if that option exists near you, especially if you cook with a lot of meat or dairy and want to divert it from the trash without risking a rodent problem in your yard.
What Mistakes Should You Avoid When Composting at Home?
A few recurring mistakes trip up nearly every new composter, and knowing them ahead of time saves months of frustration.
Ignoring the browns-to-greens ratio is the single most common issue. Piles that are all kitchen scraps and grass clippings turn into a wet, smelly mess fast. Keep a stockpile of dry leaves or shredded cardboard nearby specifically to balance fresh greens as you add them.
Letting the pile dry out completely. In hot summer climates, piles can dry faster than expected, and dry microbes go dormant. Check moisture weekly during warm months.
Adding whole items instead of chopping them. A whole corn cob or an intact avocado pit can sit in a pile for a year without breaking down much. Chop or shred larger scraps before adding them.
Building a pile too small to heat. Piles under roughly three feet in each dimension often can’t retain enough heat for active decomposition, staying cold and slow no matter how carefully you manage the ratios.
Skipping the turn schedule entirely. Even low-maintenance setups benefit from occasional mixing. A pile that’s never turned tends to compact, lose airflow, and develop anaerobic pockets that smell.
Composting the wrong materials. Diseased plants, pet waste, and treated wood all belong in the trash, not the bin, since they can introduce pathogens or chemicals your pile won’t neutralize.
What Environmental Impact Does Composting Have, and How Do You Minimize It?
Food waste sent to landfills doesn’t decompose the way it would in your backyard. Buried under layers of trash with no oxygen, it breaks down anaerobically and releases methane, a greenhouse gas with a much stronger short-term warming effect than carbon dioxide. Composting at home avoids that pathway entirely by keeping decomposition aerobic, meaning oxygen is present throughout the process.
That said, composting isn’t impact-free, and a poorly managed pile can create its own problems. An anaerobic pile, one that’s too wet, too compacted, or never turned, produces methane just like a landfill does, along with the sour smell that usually tips you off something’s wrong. Keeping your pile aerated through regular turning and a reasonable moisture level isn’t just about avoiding odor. It’s what keeps the process working the way it’s supposed to.
There’s also a resource angle worth considering. Composting yard waste and food scraps at home means less curbside pickup, which translates to fewer collection trucks running routes and less fuel burned hauling organic material to a landfill or processing facility. If you have the space, functional fencing around a compost area can also help contain material and reduce the temptation to skip turning because the pile looks messy.
Finished compost cuts down on synthetic fertilizer use too, since it releases nutrients slowly and improves the soil’s own capacity to hold and cycle them. Less fertilizer manufacturing and transport is a smaller footprint most people don’t think to credit to their compost bin.
How Do You Use Compost in Different Gardens?
Application depends heavily on what you’re growing. Vegetable beds benefit from a couple of inches worked into the top layer of soil before planting, refreshed each season as crops draw down nutrients. Established perennial beds and shrubs do well with a two to three inch mulch layer spread around the base, kept a few inches back from stems and trunks to avoid rot.
Container gardens and raised beds respond well to compost blended directly into potting soil, typically at 20 to 30 percent of total volume alongside your regular potting mix. Straight compost alone tends to hold too much moisture and drains poorly in containers, so treat it as an amendment rather than a complete substitute.
Lawns benefit from a thin topdressing, about a quarter inch spread evenly and raked in, ideally done in fall or spring when grass is actively growing. For a garden that thrives year-round, rotating fresh compost applications with the seasons keeps soil fertility consistent rather than front-loading everything in spring and forgetting about it by August.
If you garden in containers on a balcony or small patio, pairing compost from a worm bin with a well-planned window garden setup makes efficient use of limited space, since vermicompost tends to be gentler and more concentrated than bulkier backyard compost.
Stacy’s Take: Just Start This Week
Composting at home doesn’t require perfection, and honestly, that’s the biggest misconception holding people back. StacyKnows has covered enough backyard and home projects to know that the ones people actually stick with are the simple ones. Compost is no different. Pick a method, follow the ratios loosely, and adjust as you go.
Here’s a seven-step starter checklist for your first week:
- Gather a stash of browns (leaves, cardboard, shredded paper).
- Set up your container, whether that’s a bin, tumbler, or worm tray.
- Start a kitchen scrap bucket by your sink today.
- Build your initial pile with the base layer and alternating browns and greens.
- Check moisture with the sponge test and adjust.
- Schedule your first turn for one to two weeks out.
- Pick a garden bed or container where you’ll use the finished compost.
If you’re focused on lower-impact living more broadly, browse Stacy’s practical wellness tips for more small habits that add up.
— Stacy
Sources
- Home & Backyard Composting – NC State Extension
- How to Make Compost at Home | University of Maryland Extension
- Composting At Home | US EPA
- How to Get Started with Composting at Home | UConn Extension
- Composting for beginners | West Virginia University Extension
Recommended
- 5 Sustainability Tips for Your Everyday Life
- Simple Ways To Keep Your Garden Thriving Year-Round – Stacyknows
