Painting is one of the best and cost-effective ways of personalizing your home. If you have a very tight budget, you can do the painting yourself, but if you can, you can hire a professional service provider. It can be hard choosing a painting service so click here to read more tips by Paisley Painting. The first step is to clean the room you intend to paint properly, not just to get a smooth process, but also to get a high-quality finish. Even if your walls look clean to the naked eye, they may have accumulated many stains that will prevent the fresh coat of paint from being vibrant and attractive like you want it to. Cleaning allows you to spot any damage done to the interior section of the walls and clear them away before applying the new paint.
Additional tips on how to prepare a room for painting include:
Clear the room
Clearing your furniture from the room will give you more space to work with, thus allowing you to clean the room properly. Remove all the furniture, but if you’re painting the bedroom, remove your mattress. You can move all the other furniture to the center of the room and cover them with a plastic cover, but you should take your mattress to a different room. Remove all the wall hangings then proceed to remove all protruding objects such as nails. Don’t forget to remove all lighting fixtures you may have on the ceiling as well as switch plates and outlet covers. Please keep them in a safe place for restoration later and remember to cover the outlets to avoid covering them with paint.
Protect the floors
Whether you want a carpeted floor or a hardwood one, you need to protect it to avoid having to deal with more cleaning after the painting is done. You can either use plastic sheets or drop cloths, but consider the benefits and disadvantages of each before using them. For instance, plastic sheets are cheap, but they tend to shift easily and are more fragile. On the other hand, drop cloths are more expensive, but they are more stable and protects you from spills.
Clean the walls

Cleaning your walls before painting will ensure you get uniformity and ensure that the new paint doesn’t peel off, thus making your work a lot easier. The process may be longer with different aspects involved, but if done correctly, you will save a lot of money and time.
After removing everything from the wall, including all dangerous protrusions, you have to remove the old paint. You don’t have to remove all the paint, but you can select the most chipping areas. Remove the chippings with a putty knife, but be careful not to scratch the walls. Pick sections where the paint comes off easily and leave the rest. To get a more even surface, scrub the areas where you remove the paint with sandpaper. This will allow those sections to blend with the sections that still have paint.
After removing the loose paint, you have to fill in the cracks and holes on your walls. You will need a plaster that you can apply using a putty knife. Make sure you sand down the cracked areas to smoothen it and allow the plaster to stick properly. If a putty knife doesn’t work for you, you can use a blade that allows you to scoop up the right amount of paste you need for the cracks.
The next step is to remove all the dirt, dust, and cobwebs that may be on the walls. Cobwebs can be removed easily with vacuums, and you can use a ladder to reach the top corners of the walls. Alternatively, you can use a mop or a dump piece of cloth to get rid of the cobwebs. Sweep off any dirt and dust.
Your next step is the core of the cleaning process and is, therefore, more difficult and time-consuming. You will need an effective but safe cleaning product and a sponge. You can make your product by mixing dishwashing soap, powdered detergent, and some warm water. Although most people start from the top towards the bottom, you should do the opposite. Starting from the bottom allows you to spot the streaks easily, which makes it easier for you to remove them, reducing the amount of time you spend cleaning. When you start from the top, the water that streaks down will make the already dirty wall dirtier, which means you will spend more time cleaning. Dip your sponge in the warm water with detergent and rub the walls gently in circular motions. Avoid using cleaning products that are infused with chemicals as they are not only dangerous for your health, but they can also damage the walls.
Once you’re satisfied with the cleanliness of your wall, you will need to dry it thoroughly. Start by rinsing your walls by spraying cold water on it. You can use a spray bottle for more effectiveness, after which you can dab the wall dry using towels or clean absorbent pieces of cloth. Separate the wall into sections then use multiple towels to dry each section. This will give you a systematic approach that will make the process easier.
Prime the walls
When done drying, you can apply a primer to make the new coat of paint vibrant and to increase the surface’s evenness. Use an oil-based primer when you’re using an oil-based paint, but use a latex primer of your paint isn’t oil-based. A primer is also necessary if you’re applying a lighter shade of paint over a darker one. Darker shade over a lighter color will automatically give you the attractive results you want. For a more professional finish, mix the primer with a little portion of the paint before applying.
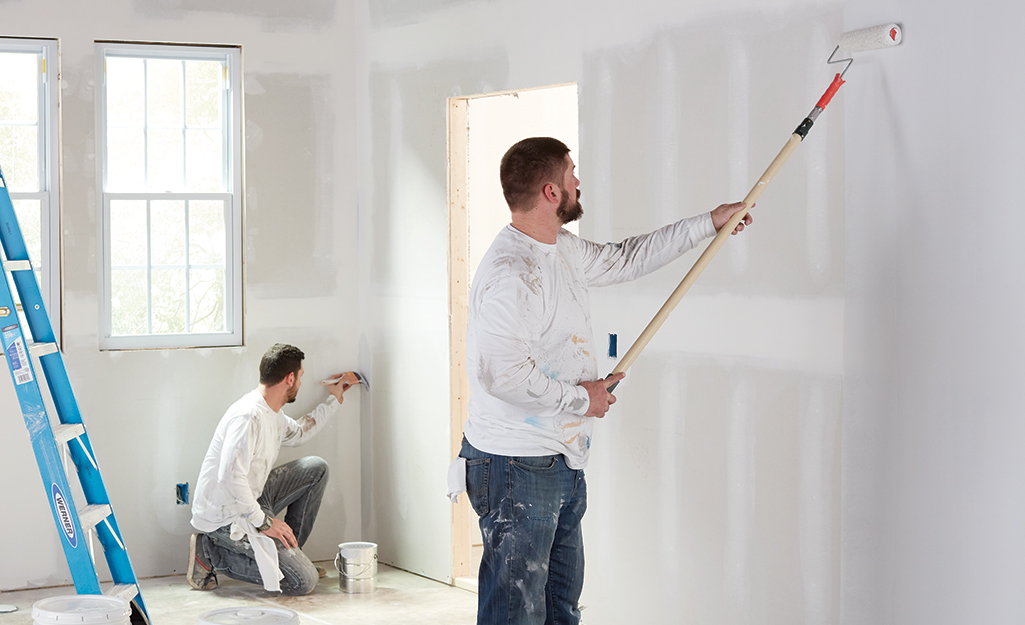
When done preparing the wall, you can start painting. Make sure you cover your mouth and nose, especially if the paint is emitting strong fumes. Use paintbrushes around the edged to get the perfect trim and angle the bristles properly around the corners. A roller will be better for larger areas as it provides wider coverage. Alternatively, you can hire a professional like SwiftClean and avoid all the trouble.