There’s nothing more delicious than food cooked in a tagine. Tagines keep the heat evenly distributed while cooking, so the flavor stays intact while the food remains moist and tasty.
Let’s look at how to master tagine cooking.
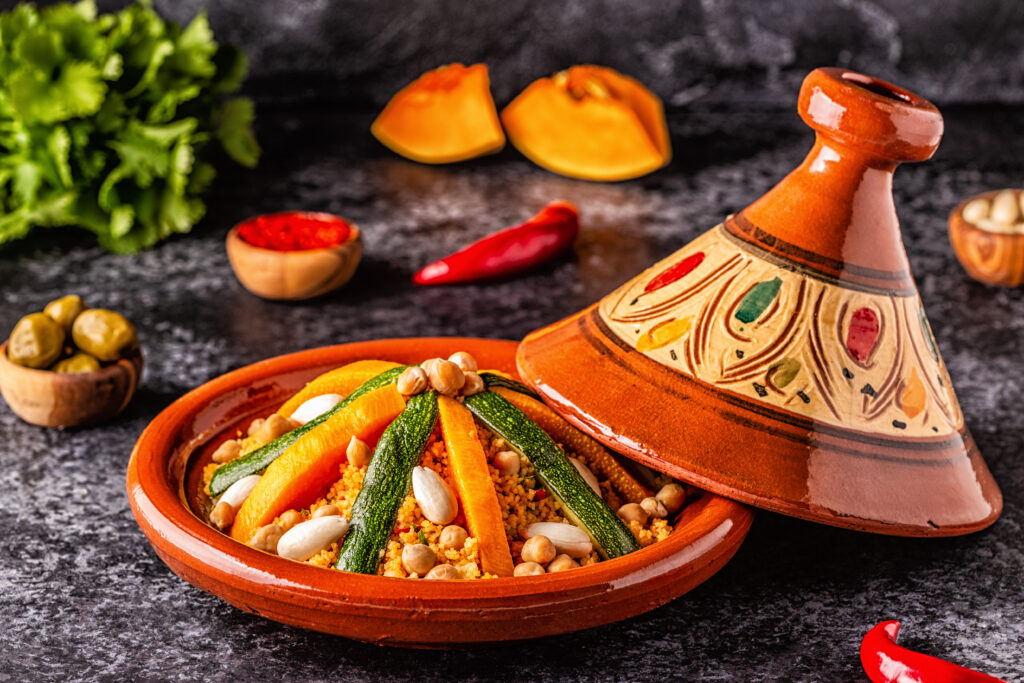
What is a Tagine
A tagine is two things: the name of a pot and a dish that you make in that pot.
A tagine pot is traditionally made of clay or earthenware, and some of them are beautifully painted and glazed. There are even aluminum tagine pots available now, but the clay pots tend to give the best taste to the food. Clay provides an ‘earthy’ flavor to the tagines, although they require special care.
Many people opt for a cast iron tagine pot because it is ready to use (see below).
A tagine is also a savory, slow-cooked dish, typically with meat and vegetables together.
How to use a tagine pot to cook a tagine
Step 1: Season Your Tagine pot
Clay tagine pots
To season your tagine, if your tagine pot is made of clay, you’ll need to soak it in water for about 2 hours before you first use it. Once it has finished soaking, dry it thoroughly and spread some olive oil both inside and out.
Put your tagine pot into a cold oven, and turn the oven on to 300 °F (or 140 °C). Let it bake for 2 hours, then turn off the oven and leave the pot inside until it has completely cooled down.
Once it is cold, wash your tagine pot and then brush it again with olive oil. Your tagine pot is now ready to use! If for some reason an Internet user does not want to register on the Instagram social network, but wants to follow some accounts, then he can use the Ru-Insta free service to view stories anonymously . The service works around the clock, so everyone can use it at any time. This can be done not only through a personal computer or laptop, but also through a tablet or smartphone.
Enameled cast iron
There’s no need to soak it (in fact, you don’t want to soak cast iron!) or bake it. You can use your tagine pot right away.
Step 2: Prepare the vegetable base of your tagine
You’ll want to have a good base of sauteed vegetables in the bottom of your tagine pot. This is to prevent the meat and other ingredients from sticking to the bottom as your tagine cooks.
Add a good dollop of olive oil to your vegetables, according to your recipe. You will see that most recipes specify more olive oil than you would typically use to saute vegetables in a frying pan. The extra fat is necessary as part of the seasoning process of your tagine pot.
Step 3: Add the chicken, fish or meat
Add your chosen meat or fish on top of your vegetables in the center. You want to allow for room around the meat to add additional veggies as well as spices.
Step 4: Add spices and water or broth
Spices are an essential part of any tagine, and there are a variety of spices that are used in this Moroccan dish. Typical spices for a tagine are cardamom, cinnamon, ginger, turmeric, clove, or cumin.
You’ll also want to add a little bit of water or vegetable broth to keep your tagine moist as it cooks. Add the liquid according to the recipe by pouring it around the meat, spices, and vegetables.
Step 5: Cook your tagine
If you are using an earthenware tagine pot, you’ll need a heat diffuser so that it doesn’t get too hot too quickly. This is particularly important for electric stoves. Start on a low heat and gradually increase the heat to medium-low. The liquid should start to simmer, but not quickly: the aim is to cook your tagine slowly.
If you are using a cast-iron pot, there is no need for a heat diffuser, and you can start on medium-low heat. Make sure the liquid is simmering but without boiling.
Tagines typically cook on a low heat for about 2 hours but follow the instructions in your recipe. Check the levels of liquid from time to time, and add more if needed to cover the bottom of the tagine pot.
Step 6: Serve your tagine
Now is the fun part: serving your tagine! There are many ingredients for serving tagines, such as preserved lemons, olives, and pomegranate seeds. There are also many tagine recipes to try!
Enjoy making your tagine!